As an Amazon Associate I earn from qualifying purchases.
Updated on April 13, 2025
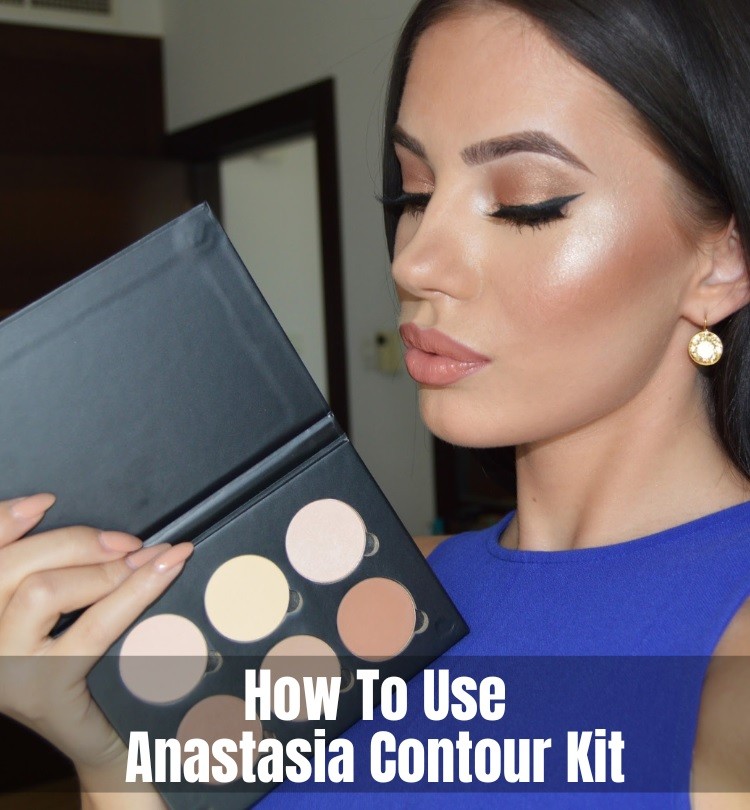
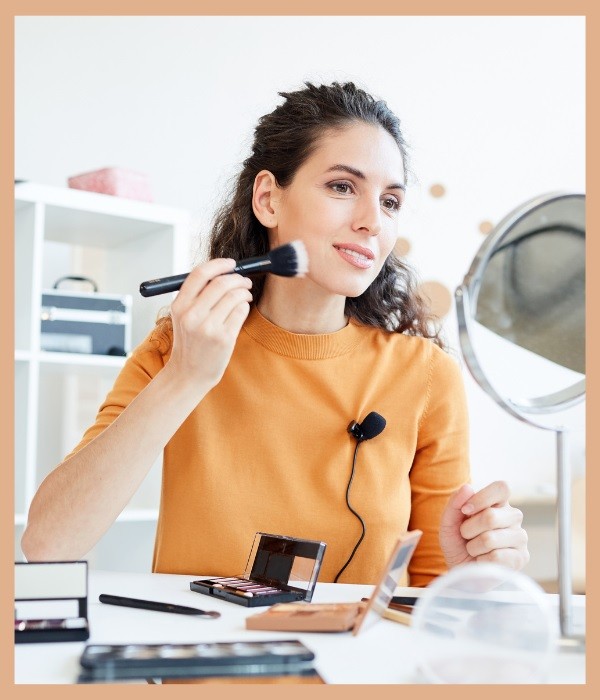
To use the Anastasia contour kit, apply the darker shades to areas you want to define and the lighter shades to areas you want to highlight. The kit also comes with a brush for added precision.
Achieving perfectly sculpted cheekbones has become easier with the Anastasia contour kit. Designed to define and enhance facial features, this kit comes in a variety of shades suitable for different skin tones. The kit contains six different shades to accentuate the cheekbones, jawline and forehead.
Its lightweight formula makes it blendable and buildable, allowing for a customizable look. The kit also comes with a double-ended brush that helps apply and blend the shades effortlessly. Whether you’re a makeup pro or just starting, the Anastasia contour kit is an essential product to add to your beauty routine.
Contents
Need To Know About Contouring
Have you ever wondered how models and celebrities attain chiseled cheekbones and defined jawlines? The secret lies in the art of contouring, a makeup technique that uses shadow and light to create the illusion of depth and dimension on the face.
Related: How To Use Revlon Eye Contour Kit?
Explanation Of Contouring – Why It’s Important?
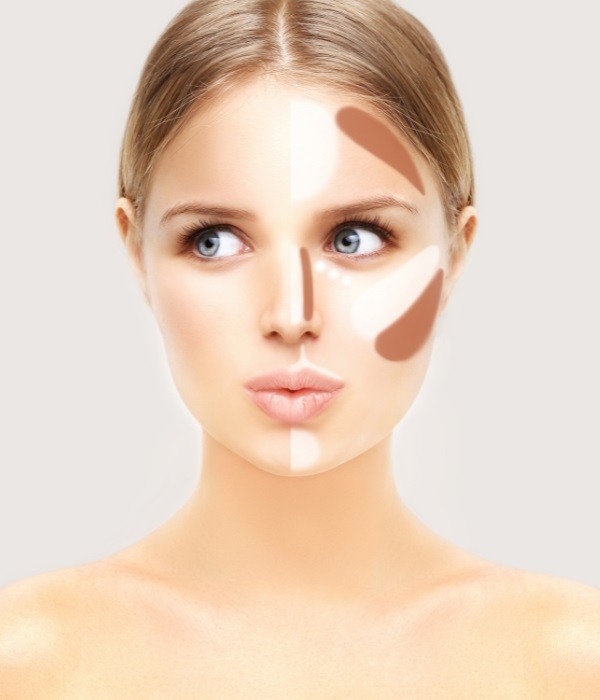
Contouring is a makeup technique that uses darker shades to create shadows, and lighter shades to emphasize facial features. It’s all about creating the illusion of depth and dimension, making your features stand out. Having a good understanding of contouring techniques is crucial for anyone who wants to enhance their makeup game.
Highlighting Vs Contouring – What’s The Difference?
Highlighting and contouring are both equally important in makeup application. Highlighting uses light shades to bring out features while contouring uses dark shades to create shadows. The two techniques work together to sculpt and define your face. Highlighting draws attention to areas like the cheekbones, bridge of the nose, forehead, and chin while contouring can slim down the nose, define the jawline, and make your cheekbones pop.
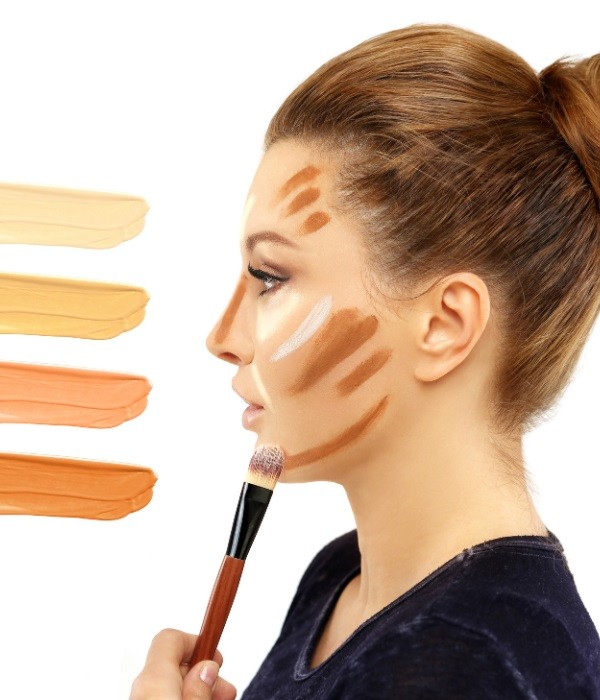
Selecting The Right Shade For Your Skin Tone
Choosing the right shade for contouring is crucial, as it can make or break your entire makeup look. When selecting a contour shade, it’s important to choose a color that is two shades darker than your skin tone. This will create a natural-looking shadow effect.
For highlighting, look for shades that are two shades lighter than your natural skin tone. Be sure to pick the right shade to avoid ending up with a muddy and unnatural look.
Key Tips For Perfect Contouring
Getting the perfect contour requires some practice. Here are some tips to help you get it right:
- Start with a good base: Before you begin contouring, make sure your skin is clean, moisturized, and primed.
- Use the right tools: Use a brush that is specifically designed for contouring, such as an angled brush. This will help you apply the product exactly where you want it.
- Blend, blend, blend: Blending is key when it comes to contouring. Use a clean brush or sponge to blend out any harsh lines and create a seamless finish.
- Don’t overdo it: When it comes to contouring, less is more. Start with a small amount of product and build it up gradually, adding more as needed.
- Consider your face shape: Different face shapes require different contouring techniques. Research the best techniques for your face shape to achieve the most flattering look.
Getting Started With The Anastasia Contour Kit
The Anastasia contour kit is a must-have in every makeup enthusiast’s arsenal. With six essential shades that cater to all skin types, you can contour, highlight, and accentuate your natural features to perfection. Here’s everything you need to know to get started:
Unboxing The Kit And Understanding The Ingredients
When you open the Anastasia contour kit, you’ll find six pans that consist of three contour shades and three highlighting shades. Here’s a breakdown of the ingredients used in each pan:
Top row (l to r):
- Vanilla: A creamy, beige highlighter that brightens the under-eye area, nose, and forehead.
- Banana: A yellow-toned highlighter that minimizes redness and evens out skin tone.
- Sand: A warm, peachy highlighter that adds warmth to the skin for a sun-kissed effect.
Bottom row (l to r):
- Java: A cool-toned, deep brown shade that creates a shadow effect for a chiseled look.
- Fawn: A medium-toned contour shade that adds depth to the cheeks and jawline.
- Havana: A warm, reddish-brown contour shade that adds dimension to the cheekbones and forehead.
Detailed Description Of Each Shade In The Kit And Their Purposes
Each shade in the Anastasia contour kit serves a specific purpose. Here’s a detailed description of each shade and its benefits:
- Vanilla: A creamy, beige highlighter that brightens the under-eye area, nose, and forehead.
- Banana: A yellow-toned highlighter that minimizes redness and evens out skin tone.
- Sand: A warm, peachy highlighter that adds warmth to the skin for a sun-kissed effect.
- Java: A cool-toned, deep brown shade that creates a shadow effect for a chiseled look.
- Fawn: A medium-toned contour shade that adds depth to the cheeks and jawline.
- Havana: A warm, reddish-brown contour shade that adds dimension to the cheekbones and forehead.
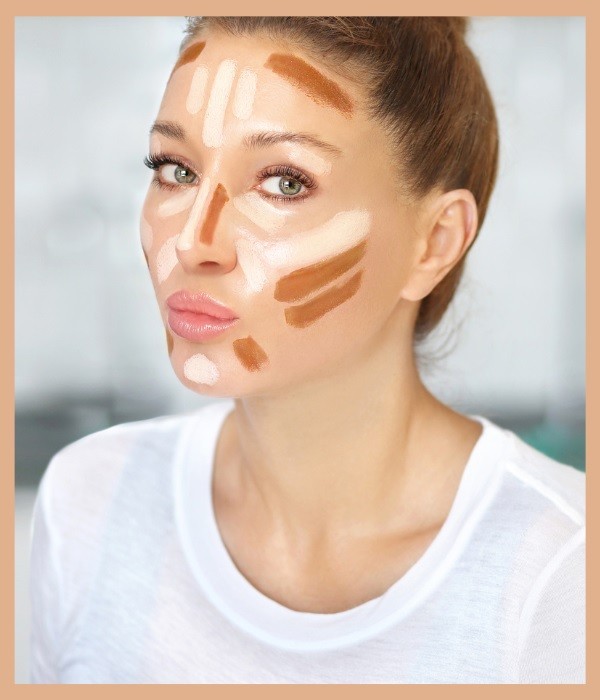
Step-By-Step Guide – How To Apply Each Shade?
Related: Is Native Shampoo Good For Your Hair?
Follow these simple steps for a flawless contour and highlight:
- Apply foundation all over the face and neck.
- Use bananas under the eyes, on the forehead, and on any areas with redness.
- Apply sand on the high points of the face, such as the cheekbones, nose, and cupid’s bow.
- Sweep java under the cheekbones, jawline, and temples.
- Use fawn to blend out java and create a softer contour.
- Apply Havana on the outer perimeter of the face for a bronzed look.
- Blend everything seamlessly with a brush or beauty sponge.
Dos And Don’ts Of Using The Anastasia Contour Kit
Here are some important dos and don’ts to keep in mind while using the Anastasia contour kit:
Dos:
- Use a light hand while applying the shades for a natural-looking finish.
- Blend, blend, blend! This will ensure a seamless, airbrushed look.
- Experiment with mixing and matching the shades to find what works best for your skin tone.
- Use a primer before applying foundation for a smoother application and longer-lasting wear time.
Don’ts:
- Don’t apply too many products at once. You can always build up the intensity as needed.
- Don’t forget to set the cream products with a powder to prevent any creasing or smudging.
- Don’t be afraid to try different application techniques, such as using a brush or sponge, to find what works best for you.
With these tips and tricks, the Anastasia contour kit will quickly become your go-to for flawless, sculpted skin.
Advanced Techniques For Using The Anastasia Contour Kit
The Anastasia contour kit is a makeup artist’s best friend. It comes with six different shades, five for contouring and one for highlighting, that are perfect for all skin tones. While the kit is suitable for beginners, there are some advanced techniques that can be used to create a variety of looks and enhance different facial features.
Tips For Blending And Mixing Shades
Achieving the perfect blend is vital for a flawless contour. A few tips to keep in mind are:
- Use a fluffy brush for a more natural finish
- Blend outwards in circular motions
- Start with a lighter shade and gradually build up for more intensity
- Use a clean brush to blend the areas where the shades meet
- Mix shades to create a custom color that matches your skin tone perfectly.
How To Use The Kit For Different Occasions?
The Anastasia contour kit can be used for both day and night looks. Here are some ideas to get you started:
- Natural and subtle daytime look: Use lighter shades for contouring and highlighting under the eyes, cheekbones, and bridge of the nose.
- Dramatic and defined nighttime look: Use darker shades to deepen the contour and define the jawline and temples. Highlight above the cheekbones and the cupid’s bow of the lips for a glowing effect.
- Special occasions: Mix together a few shades to match your dress and create a more cohesive look.
Using The Anastasia Contour Kit For Different Face Shapes
Different face shapes require different contouring techniques. Here are some tips:
- Oval face: Contour along the hairline, temple, and under the cheekbones in a c-shape. Highlight under the eyes and on the forehead.
- Round face: Contour along the temples, cheeks, and jawline to create a more angular look. Highlight on the forehead and under the eyes.
- Heart-shaped face: Contour along the temples and jawline to create balance. Highlight above the cheekbones and on the chin.
- Square face: Contour along the forehead and jawline to soften the angles. Highlight on the cheekbones and above the eyebrows.
- Long face: Contour along the temples and under the cheekbones to create width. Highlight on the forehead and under the eyes.
Related: Does Native Shampoo Cause Hair Loss?
Highlighting And Concealing Specific Areas Of Your Face
Using the highlighting shade on certain areas of your face can brighten and lift your features. Here are some areas to focus on:
- Under the eyes: Apply highlight under the eyes in an inverted triangle shape to brighten and conceal dark circles.
- Bridge of the nose: Apply highlight down the center of the nose to make it appear longer and slimmer.
- Cupid’s bow: Highlight the cupid’s bow of the lips to create the illusion of a fuller pout.
- Above the cheekbones: Apply highlight above the cheekbones to create a subtle, glowing effect.
By implementing these advanced techniques, you can take your makeup skills to the next level and enhance your natural beauty. So go ahead and play around with the shades, experiment with different techniques, and have fun!
Frequently Asked Questions
What Is Anastasia Contour Kit Made Of?
The Anastasia contour kit is made of finely milled powders that blend effortlessly to create natural, defined contours.
How Many Shades Are There In Anastasia Contour Kit?
The Anastasia contour kit has six shades that can be used to create a variety of natural-looking contours.
Is Anastasia Contour Kit Suitable For All Skin Types?
The Anastasia contour kit is suitable for all skin types as the finely milled powders blend seamlessly into the skin.
How Do I Apply Anastasia Contour Kit?
Use a contour brush to apply the darker shades to the areas you want to contour and a fluffy brush to apply the lighter shades to highlight.
Can I Use Anastasia Contour Kit Everyday?
Yes, the Anastasia contour kit can be used every day to create natural-looking contours that enhance your features. Just remember to blend well.
Conclusion
After reading this blog, you have gained a fair understanding of how to use the Anastasia contour kit. The contour kit gives you the power to bring out the best features of your face. Before you start using the kit, ensure that you have the right shade for your skin tone. Remember to use it in moderation, blend thoroughly, and use the right brushes for the right areas.
Also, keep in mind that contouring is not a one-size-fits-all technique. Experiment and find what works best for you. With a little patience and practice, you will be able to create a stunning look that leaves everyone around you awestruck. Keep these tips in mind and use the Anastasia contour kit to your best advantage, looking your best all day.