As an Amazon Associate I earn from qualifying purchases.
Updated on April 13, 2025
Using a contour kit involves four basic steps: contouring, highlighting, blending, and setting. To use a contour kit, begin by identifying the areas of your face you want to contour and highlight.
Contouring has gained widespread popularity in recent years due to its ability to create dramatic cheekbones, slim down the nose, and define the jawline. Using a contour kit can be intimidating if you are not used to applying makeup. This guide will help you understand the basics of how to use a contour kit. Whether you are a beginner or a pro, these tips will help you achieve a flawless, contoured look.
Contents
The Basics Of Contouring And Why Use A Contour Kit
Contouring is a makeup technique that has been gaining popularity over the years. It is a technique that uses makeup to create shadows and highlights on the face, giving the illusion of a more defined facial structure. Here are some key points to keep in mind when it comes to contouring:
- Contouring can help add definition and shape to the face, making it appear more sculpted and chiseled.
- Contouring is ideal for photoshoots, special events or when you want to look your best.
- A contour kit contains various shades and hues that can be used to create shadows and highlights on the face and a blending brush.
What Is Contouring And Why Is It Important?
Contouring is a makeup technique that uses dark and light shades to create shadows and highlights on the face. Here are some reasons why contouring is important:
- Contouring helps to create a definition on the face, giving the illusion of a more sculpted and chiseled face.
- With contouring, you can enhance your best features, create balance on the face and camouflage less desirable features on your face.
- It is important to choose the right contour kit that has the shades that complement your skin tone to get the best results.
Related: How To Use Smashbox Contour Kit?
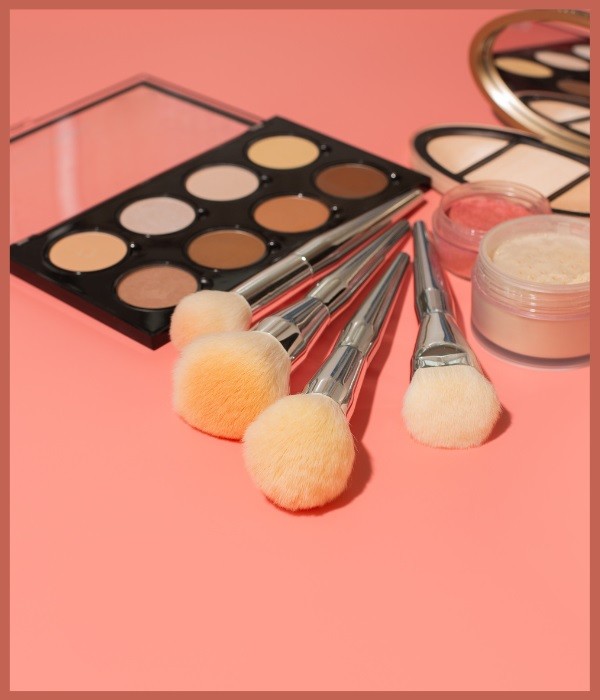
Types Of Contour Kits And How To Choose The Right One
When it comes to contour kits, there are two main types: powder-based and cream-based. Here are some tips to help you choose the right contour kit for your needs:
- Powder-based contour kits are ideal for those with oily skin as they control shine and won’t clog pores.
- Cream-based contour kits are best for dry skin as they blend easily and hydrate the skin.
- Look for contour kits with shades that match your skin tone so that the contour blends well and gives a more natural result.
- Consider investing in a contour kit with a blending brush to get that perfect blend and save money you would have spent on buying a brush separately.
Benefits Of Using A Contour Kit
Using a contour kit can bring a lot of benefits to your makeup routine, here are some of the benefits:
- Contouring adds definition to your face making it look more angular and chiseled.
- It can help you hide harsh lines and create a more natural look that complements your features.
- With different shades of contour, you can create a more sharp and defined look or a more subtle and natural look depending on the occasion.
- Contouring can also be used to create the illusion of a more prominent cheekbone or slim down a nose.
Prepping Your Face For Contouring
Contouring has become a popular trend in the make-up world. The art of contouring can magically transform your face by creating depth and dimension. Nailing the technique is crucial to achieving flawless results. Before you begin with the contouring process, it’s essential to prepare your skin.
This section will guide you through the prepping process before you start applying contour.
Skincare Routine Before Applying Makeup
Before you start with your make-up routine, it’s essential to nurture your skin with some essential skincare products. These products will help keep your skin healthy, hydrated and nourished, which is vital before applying make-up.
- Cleanse your face thoroughly with a gentle cleanser to remove any dirt, grime, and excess oil.
- Exfoliate your skin using an exfoliating scrub to remove dead skin cells and promote cell regeneration.
- Apply a moisturizer that suits your skin type. This will help hydrate your skin and create a smooth base for the makeup.
- Apply sunscreen with at least SPF 30 to protect your skin from the sun’s harmful rays.
Applying Primer And Foundation
Once you have prepped your skin, it’s time to apply primer and foundation. These products can create a flawless base for the contouring process.
- Apply a primer to your entire face. This will smooth out your skin’s texture, minimize pores, and help your make-up last longer.
- Choose a foundation that matches your skin tone and apply it with a brush or a sponge. Start applying from the center of your face and blend it outwards towards your hairline and neck. Always blend your make-up well for a seamless finish.
- For contouring, select a shade that is two shades darker than your skin tone. Apply it to the hollows of your cheeks, jawline, and temples. Always blend it well to create a natural-looking shadow effect.
Setting Your Foundation
Setting your foundation is essential to ensure that your make-up stays in place all day long.
- Use a translucent powder to set your foundation. Apply it lightly all over your face using a powder brush.
- To set your contour, use a matte powder that’s darker than the contour shade you used. Apply it carefully on the areas you contoured, such as your cheekbones, jawline, and temples.
Prepping your skin is crucial before beginning the contouring process. It creates a smooth canvas for your make-up, helps it last longer, and enables the contour to blend smoothly. Follow the simple steps above to achieve a flawless, sculpted look and boost your confidence.
Related: How To Use Anastasia Contour Kit?
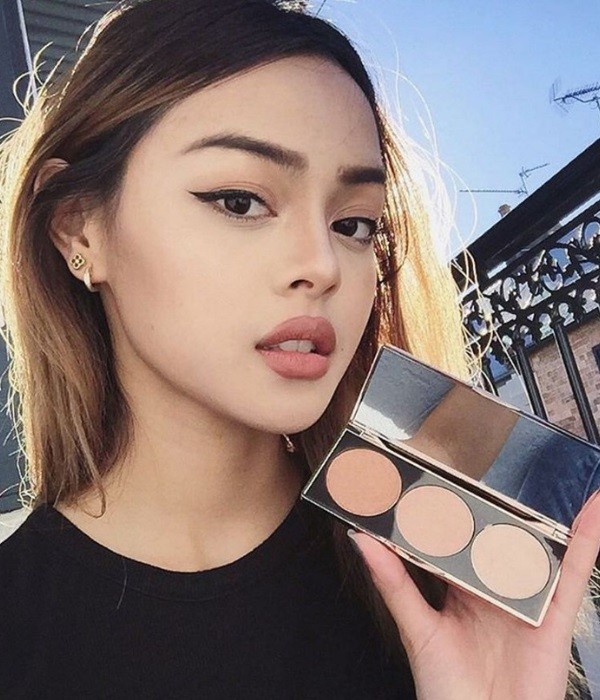
Choosing The Right Shades And Tools
Contouring is all about enhancing your features and achieving a sculpted look that flatters your face shape. Whether you’re a beginner or a pro, choosing the right shades and tools is crucial for nailing the perfect contour. Here are some tips to help you get started:
How To Choose The Right Shade For Your Skin Tone?
One of the most important considerations when picking a contour shade is your skin tone. Using the wrong shade can make the contour look muddy and unnatural. Here’s what you need to keep in mind:
- Fair skin tones: Go for cool-toned shades that are one or two shades darker than your natural skin tone.
- Medium skin tones: Warm, neutral shades that are a shade or two darker than your skin tone work best.
- Deep skin tones: Rich, warm shades that are three or four shades darker than your natural skin tone look stunning.
It’s always a good idea to test the shade on your skin before committing to it. Don’t forget to consider the undertones as well – cool-toned shades are great for pink or red undertones, while warm-toned shades work well for yellow or golden undertones.
Blending Tools And Techniques
The right tools and techniques can make all the difference when it comes to blending your contour. Here are some tips to help you get that seamless, airbrushed look:
- Use a soft, dense brush for precise application. A fan brush or an angled brush works great for contouring.
- Start with a light hand and build up gradually, blending as you go.
- Use circular motions to blend the contour, focusing on the edges to avoid harsh lines.
- Don’t forget to blend your jawline and neck to avoid an obvious line of demarcation.
Highlighting And Shading Techniques
Contouring isn’t just about shading – it’s also about highlighting the high points of your face for a balanced look. Here are some key techniques to keep in mind:
- Use a light concealer or highlighter to accentuate the high points of your face – the tops of your cheekbones, the bridge of your nose, your cupid’s bow, and your forehead.
- Blend the highlighter with a damp beauty blender or a small fluffy brush.
- Use a contour shade to create shadows under your cheekbones, along your jawline, and around your hairline to create depth and definition.
- Blend the contour with a dense brush or a beauty blender to create a seamless finish.
With these tips and techniques, you’ll be able to use your contour kit like a pro in no time. Play around with different shades and techniques to find what works best for you – and don’t forget to have fun!
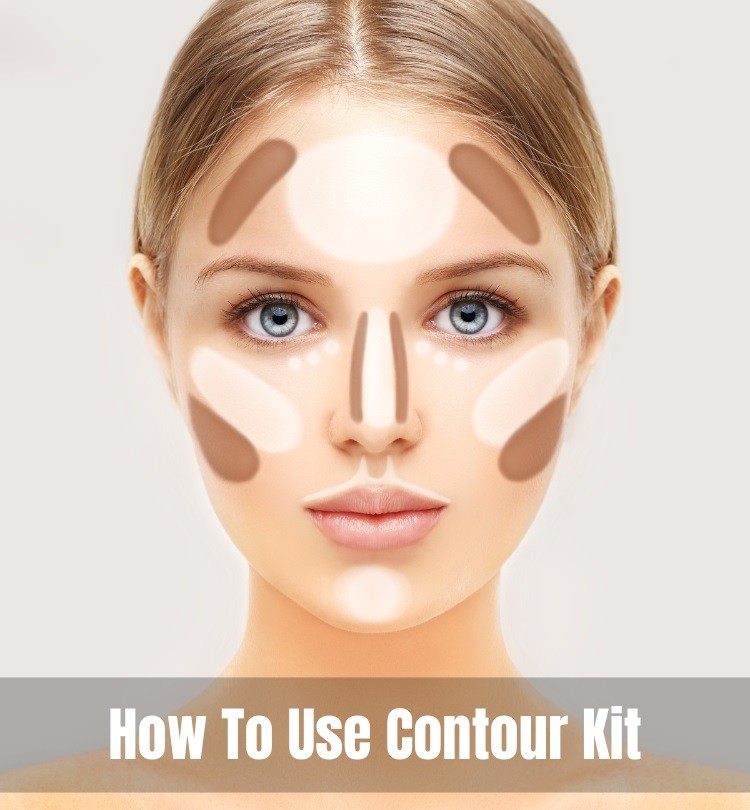
How To Apply Contour On Different Face Shapes
Contouring can help enhance your facial features by creating the illusion of shadows and highlights. The technique varies depending on your face shape. Here’s how to apply contour on different face shapes:
How To Contour Round Face?
If you have a round face, contouring can help make your features look more defined. Here’s how to do it:
- Apply the contour shade along your temples, under your cheekbones, and jawline.
- Blend the contour shade well to avoid harsh lines.
- Apply a highlighter on the top of your cheekbones, the center of your forehead, and the bridge of your nose.
- Blending is key to making your features look natural and defined.
How To Contour Oval Face?
If you have an oval face, you can contour to create more dimension to your face. Here’s how to do it:
- Apply the contour shade in the hollows of your cheeks, along your forehead, and the jawline.
- Make sure you blend well to create a natural look.
- Use a highlighter on the top of your cheekbones and the center of your forehead to accentuate your features.
How To Contour Square Face?
If you have a square face, you can use contouring to soften your features. Here’s how to do it:
- Use the contour shade under your cheekbones, along your jawline, and the sides of your forehead.
- Blend well to create a natural look.
- Use a highlighter on the top of your cheekbones and the center of your forehead to add dimension to your face.
How To Contour Heart-Shaped Face?
If you have a heart-shaped face, contouring can help balance your features. Here’s how to do it:
- Use the contour shade in the hollows of your cheeks, along your temples, and the sides of your forehead.
- Make sure you blend well to create a natural look.
- Apply a highlighter on the top of your cheekbones, the center of your forehead, and the tip of your nose to bring out your features.
Remember to use a light hand when applying the product and blend well for a natural look. With practice, you’ll be able to contour like a pro!
Related: How To Use Revlon Eye Contour Kit?
Tips And Tricks For Perfect Contouring
Contouring is a makeup technique that has taken the beauty world by storm. Everyone wants to try it out, but not everyone knows the right way to do it. With these tips and tricks, you can perfect the art of contouring and achieve that flawless, chiseled look you desire.
Blending Contour With Other Makeup
Blending is the key to achieving perfectly contoured features. Follow the steps below to blend your contour with the other makeup on your face.
- Apply your foundation and concealer first to create a smooth base for your contour.
- Apply your contour in small strokes on the areas you want to slim down or enhance.
- Blend the contour by using a brush or a damp makeup sponge in circular motions until it looks natural.
- Blend your contour into your blush and bronzer so that it all looks seamless and blended.
How To Clean And Maintain Your Contour Kit?
Cleaning and maintaining your contour kit is essential for ensuring that it lasts a long time and stays bacteria-free.
- Clean your contour brushes after each use to remove any excess makeup.
- Wash your contour kit once a week with warm water and soap.
- Let it air dry completely before using it again.
- Do not share your contour kit with anyone to avoid cross-contamination.
Common Mistakes To Avoid While Contouring
While contouring can enhance your features, it’s important to avoid these common mistakes that could ruin an otherwise flawless makeup look.
- Choosing the wrong shade of contour can make it look too obvious or muddy.
- Applying too much contour can give you an unnatural and harsh appearance.
- Not blending your contour properly can make it look like a harsh stripe on your face.
- Ignoring the shape of your face can result in horribly mismatched features.
Follow these tips and tricks for perfect contouring and you will be amazed at how easy it is to achieve that stunning, chiseled look you desire.
Frequently Asked Questions
What Is A Contour Kit And Why Use It?
A contour kit is a makeup tool used to define and sculpt the facial features.
What Are The Steps To Use A Contour Kit?
Apply the dark shade under the cheekbones, blend it, and then highlight the top of the cheekbones.
Which Shades Should I Use For Contouring?
Choose a shade two to three times darker than your skin tone for contouring.
Can I Use A Contour Kit For Everyday Makeup?
Yes, you can use a contour kit for both natural and dramatic makeup looks.
How Do I Choose The Right Contour Brush?
Choose a small, fluffy brush to apply contour and a smaller one to highlight.
Conclusion
Using a contour kit might seem intimidating at first, but with the right tools and techniques, it can be a fun and easy addition to your makeup routine. As we’ve discussed above, starting with a clean face, selecting the right shades, and blending are all crucial steps to achieving a flawless contour.
Additionally, mastering the different types of contouring, such as nose and jawline contouring, can help enhance your overall look. Remember to take your time and practice, and don’t be afraid to experiment and have fun with your contour kit. With these tips and tricks, you’ll be able to contour like a pro in no time and achieve a sculpted and defined look that will elevate your makeup game.